by W.A. SteerĀĀPhD
![]()
by W.A. SteerĀĀPhD
| Back to contents | About... |
![]()
Last year I generated a series of photographs and test-images which I took around a number of local stores and photographic shops offering digital photo-printing services, to evaluate them from a technical perspective. This page is an update on new findings and understandings revealed since then.
<<< Original RESULTS (previous page) See previous page for the original technical results.
Unfortunately the excellent Frontier-operator at my local shop moved on to better things in November 2005, and on the few of times I've had prints since then, their prints have emerged with varying degrees of green cast - particularly noticeable on greyscales or black-and-white prints. :-(
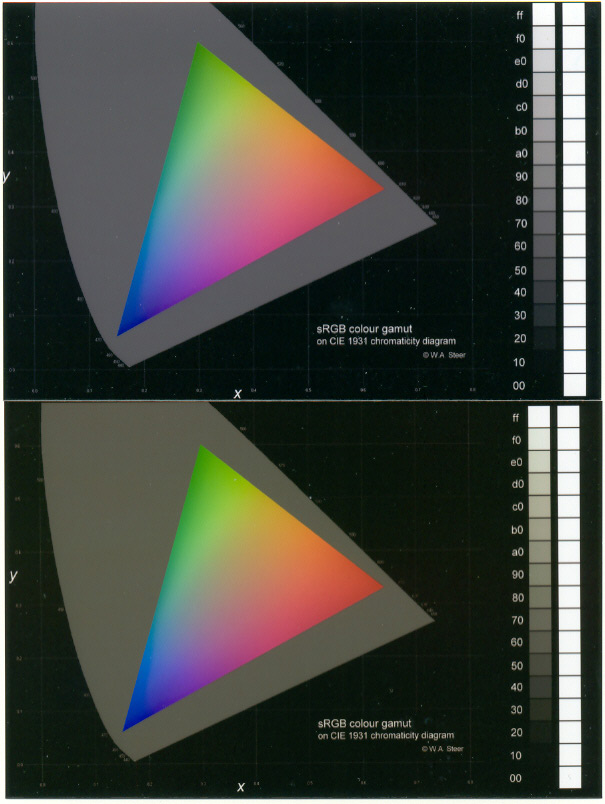
| Jessops / Frontier Same store, same Frontier: top image from July 2005 and representative of consistent results with that operator, bottom image from a recent visit in February 2006. Note the horizontal smearing as pictured (especially from the white bar) is caused by veiling glare in my scanner and does not exist on the prints themselves. |
|
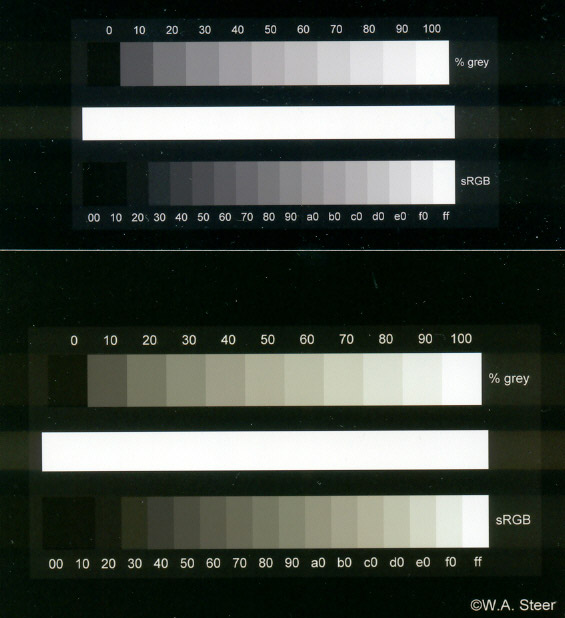
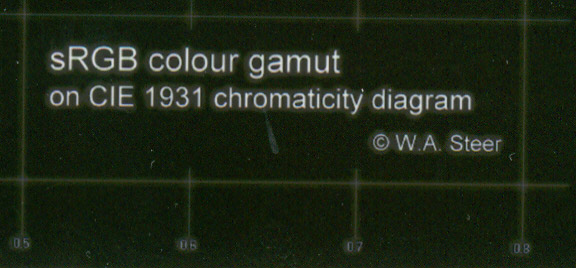
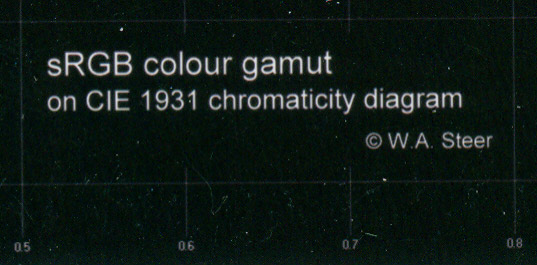
| Jessops / Frontier As above, Colour diagrams from July 2005 (top) and February 2006 (bottom). The recent greeny tint is obvious in the grey background and greyscales. |
 |
The DKS1550 was loaded with Kodak paper for all the prints featured here.
At present, this page represents INITIAL COMMENT ONLY on the DKS1550.
I've presented the key images, but have not yet had time to do a fair side-by-side comparison of the actual prints with those made by
the other machines last year.
| Photo-Me DKS1550 Reasonable: the image looks a bit low-contrast here, but I need to put the original prints side by side before making any judgement. Also I only have one print to hand; we made several with different colour settings - I don't know for sure which version this one is. |
 |
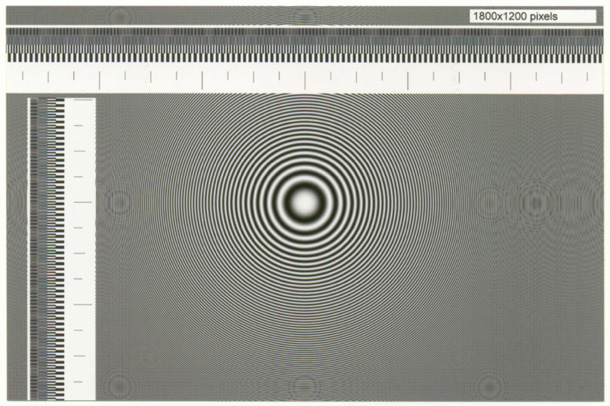
| Photo-Me DKS1550 This pair of images is very interesting and shows at the top the colour diagram treating my source image as if in the native DKS1550 colour-space, while the version at the bottom was supposed to be printed using a 'proper' conversion from my original sRGB colour-space. Curiously, the colour diagram image has revealed an unexpected printing issue: fine lines or white text are sporting halos against the black background (more on this below). |
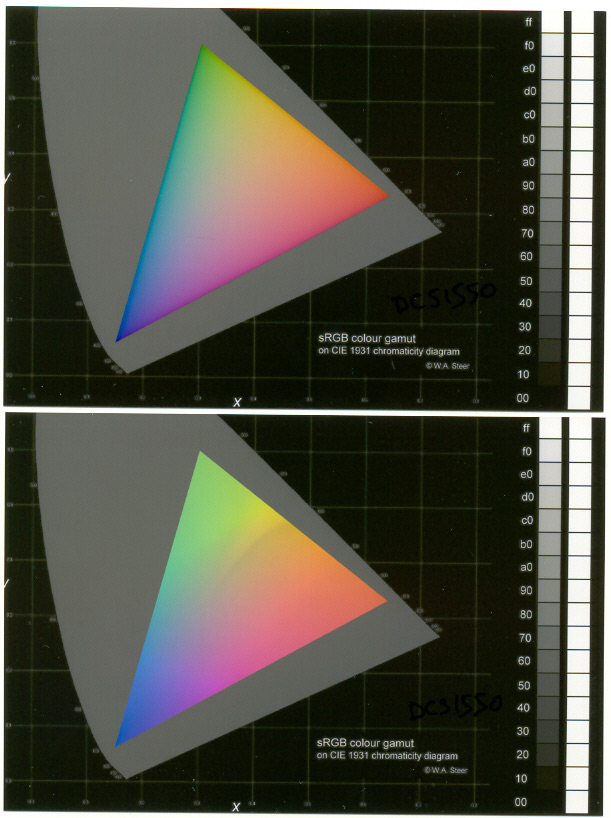 |
My original colour graphic is designed for emissive displays (rather than reflective prints), and exercises the absolute boundaries of sRGB colour-space - an accurate conversion to a photographic print may simply not be possible. As a general rule, ignoring colour spaces and treating any image as if in the native space of the printer (top image) will result in the most saturated and 'punchy' print, even if the colours are inaccurate. The gamut-mapping (lower) approach will try to keep the colours accuarate where possible (particularly for less-saturated colours) but very often compromises inevitably have to be made with more saturated colours. [This comparison suggests that the Kodak Digital Photomaker kiosk (see original results page) may also be trying to do accurate gamut mapping.]
| Photo-Me DKS1550 Close-up (300dpi) scan showing halos around my fine text and lines on the Colour Diagram print |
 |
| Fuji Frontier (July 2005) Close-up (300dpi) scan showing very clean reproduction of detail In both cases please forgive the spots/fluff on the images - I forgot to clean the glass of my scanner before doing the scans! |
 |
Now my Photo-Me guide suggested this artifact may be caused by the LCD stepping. I wasn't entirely convinced, it being a fairly serious shortcoming - and bigger than 1-pixel radius anyway. Since the photographic paper is a negative medium, again you wouldn't normally expect bleed from bright to dark areas in the final image. Looking at a number of my graphics prints later, it appears that the halo-ing is much worse on prints from lower-resolution source bitmaps (eg the Colour Diagram at 1800×1200, and less), and much less obvious on those from higher resolution originals (eg 2100×1500 upwards). It's a bit of a long-shot, but I'm tending to think this artifact may originate in software or software image-scaling algorithms?
The zoneplates and scaling tests will inevitably prove tougher DKS to manage as at 300dpi they are not so well matched to the 340dpi of the DKS as to the Frontier.
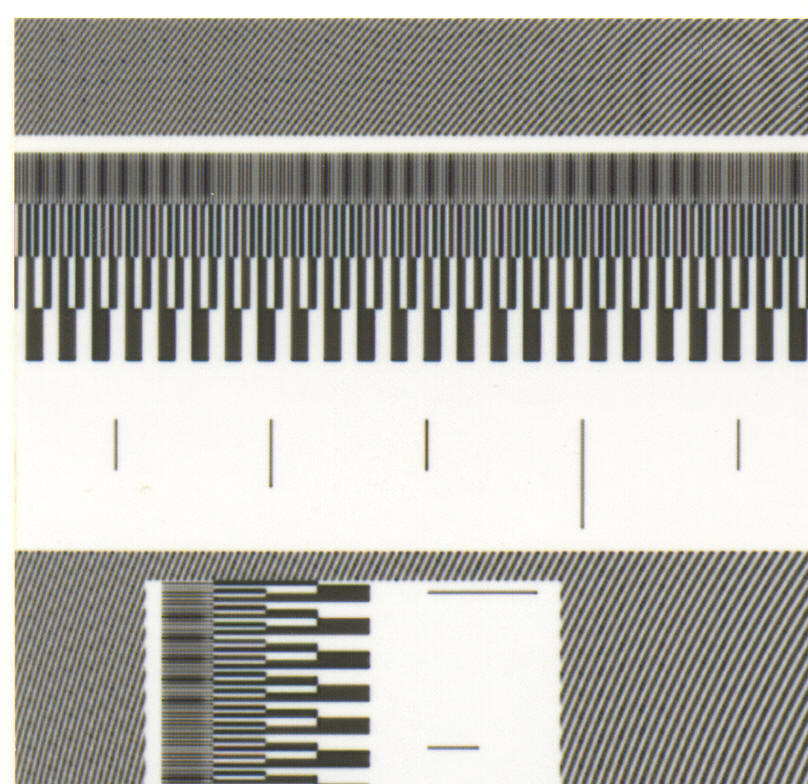
| Photo-Me DKS1550 The grey is quite neutral and the contrast ok, but there's quite significant evidence of rogue rings. It's possibly not helped by the mis-match of resolution of my source-image (300dpi nominal) to the DKS1550's 340dpi, and this is particularly evident in the reproduction of the pixel-on/pixel-off lines along the top and left. |
 |
| Photo-Me DKS1550 How would you describe it? The fine diagonal (curved) lines just don't have the precision of the Frontier prints from my original review, but it's difficult to know how much the DKS1550 has been handicapped by having to work from a 340/300dpi resolution mismatch. The disturbances to the finest row of black/white lines do seem to point to less-than-perfect resampling, and the vertical disturbance to the bar is very strange... I suspect this may be another manifestation of the same issue which causes the halo-ing around white text on the black background. |
 |
One final oddity I noticed with the DKS1550 is that some prints, under some circumstances, had detectable "raster" lines. You'd need to look very closely (or with an eyeglass) to see this, but it was particularly curious that it was present on some prints and virtually absent on others, even for duplicates of the same image. Again it's guesswork, but I'd look at the piezos stepping the LCD and check whether there's some 'creep' (or other mechanical/thermal/vibration problem) causing some of the multiple-exposures to slightly mis-align. Alternatively maybe something in the LCD or shutter is giving non-uniform exposure times for the sub-exposures?

"Raster lines" on a print (600dpi scan for illustration). In this case running parallel to the short (4") edge of the print.
We did scan two frames from a 35mm negative film. While not enough to necessarily be representative, results were fairly encouraging and the negative scanner may yet prove better than the (frankly disappointing) Fuji.
I'd also be interested to hear from any magazine which might be interested in collaborating with me to do a review...
©2006 William Andrew Steer